

SlideshowBox usage tutorial
Flash component
Using the SlideshowBox component to create photo albums and slide shows requires a few easy steps:
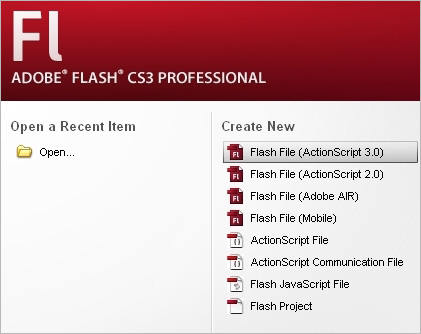
1. Open Adobe Flash CS3/CS4/CS5 and create a new AS3 file: select File > New > Flash File (ActionScript 3.0).
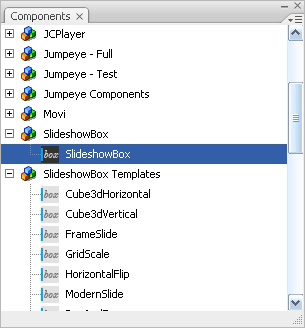
2. Open the Components panel (Window > Components or Ctrl + F7 for Windows/Cmd + F7 for Mac OS) and, from the SlideshowBox folder, select the SlideshowBox component. Drag the component and place it on the stage.
3. Next, using the SlideshowBox Panel, you must specify the domain key(s) purchased for your SlideshowBox license so when you host the slideshow on the domain for which the key was generated the watermark will not be displayed. The slideshow will work normally without the domain key, but it will display a watermark. The most important thing to set for the slideshow is the source XML containing the list of images and information (title/description if it is the case) that will be loaded into the SlideshowBox component. You will also need to specify which of the SlideshowBox templates you want to use. For this, click on the SlideshowBox component youve just placed on the stage to make sure it is selected and next, open the SlideshowBox Panel (Window > Other panels > SlideshowBox Panel).
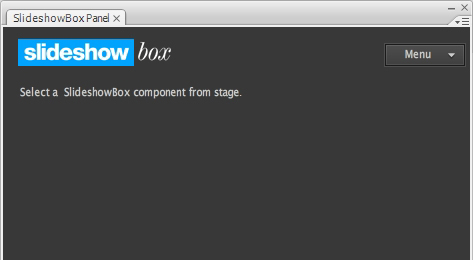
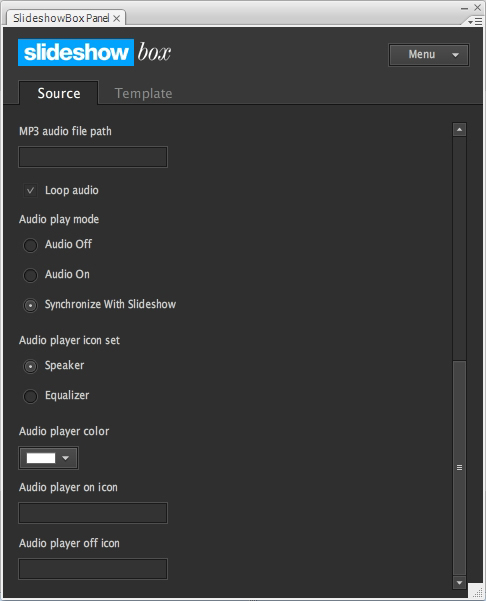
4. If the SlideshowBox Component object is selected, the SlideshowBox Panel will display
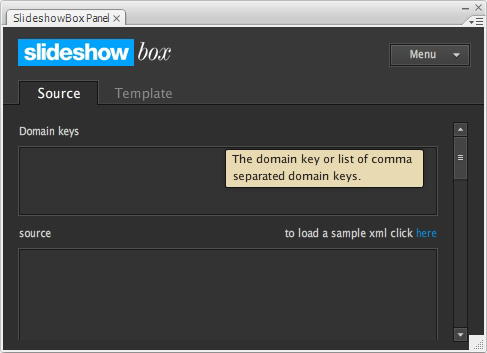
information for that component instance. In the SlideshowBox Panel, set the source for the slide
show (as the URL of your XML file or as the XML data itself). If you enter a domain key for the
Internet domain where the slidshow will be hosted, the slideshow will not display a watermark.
You can also set the audio player properties if you would like add an mp3 file to be played during
the slide show.
Note: If you would like to use SlideshowBox on subdomains of the main domain you specified, please contact us at:
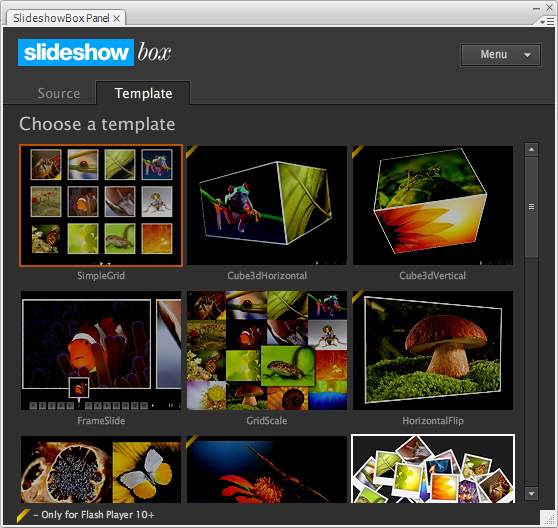
At this point the slide show should work with the default template (since you didn't choose a
template yet). Next, choose one of the SlideshowBox templates you wish to use. Once you select
the template you like, the SlideshowBox Panel will import it automatically into the library.
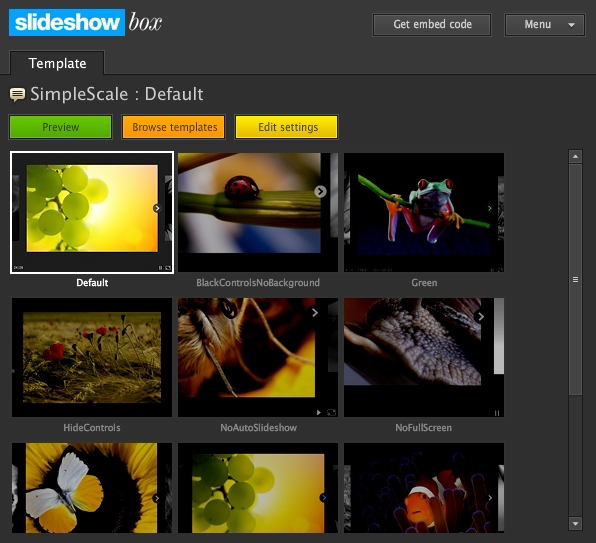
Note: The album templates and template presets are displayed as lists of icons. Each icon is actually a screen shot of the template/preset. To see the selected template or preset in action, simply click on the Preview button in the Template tab.
5. Once you choose a SlideshowBox template, you may customize it and then test your file by hitting Ctrl + Enter for Windows or Cmd + Enter for Mac OS.
Note: From this point onward, to create multiple slide shows, you can simply use multiple SlideshowBox instances on the stage. To do this, drag the SlideshowBox Component from your library over the stage; then, use the SlideshowBox Panel to configure them.
Note: If you would like to use a single SlideshowBox instance for your slide shows and continually change the source property to a different XML data you will need to use ActionScript 3.0 code (intermediate or advanced Flash/coding skills are required).
SWF embed
SWF files can be embeded in HTML files using one of two ways:
- embed the SWF file using the standard <object> HTML tag which
works in any browser without problems
- embed the SWF file using JavaScript (for example using SWFObject) which allows for
testing Flash Player version number or whether Flash Player is installed or not,
and take the necessary actions in these cases.
For both methods the users are required to have Flash Player installed in their browsers (we always recommend installing the latest version from Adobe's website http://get.adobe.com/flashplayer/). For the JavaScript method, users must have JavaScript enabled in their browsers but this is set by default so you shouldn't worry about it
Note: The slideshow will display a watermark if you do not supply a correct domain key the domain key must correspond to the domain the slideshow will be hosted on. If you would like to use SlideshowBox on subdomains of the main domain you specified, please contact us at:
The easiest way to set up a slideshow and embed it into your own HTML page is by using the SlideshowBox online configuration panel: http://www.slideshowbox.com/online-panel.html.
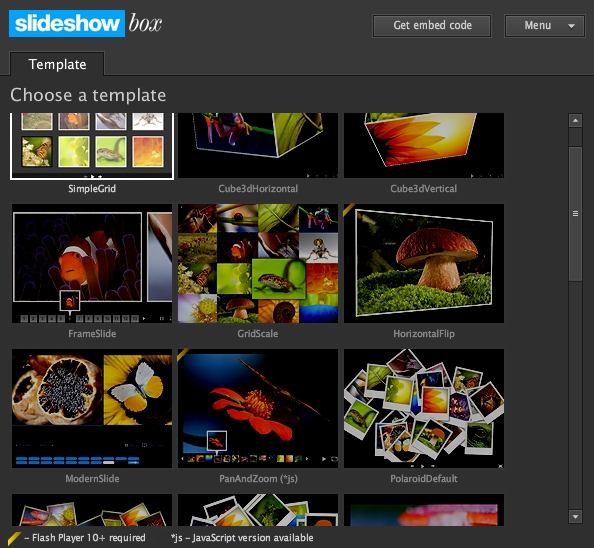
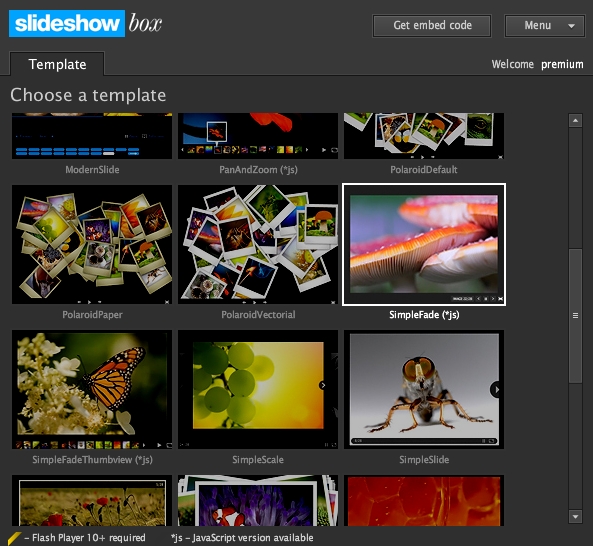
1. Open the SlideshowBox online configuration page and select the template you would like to use to display your album.
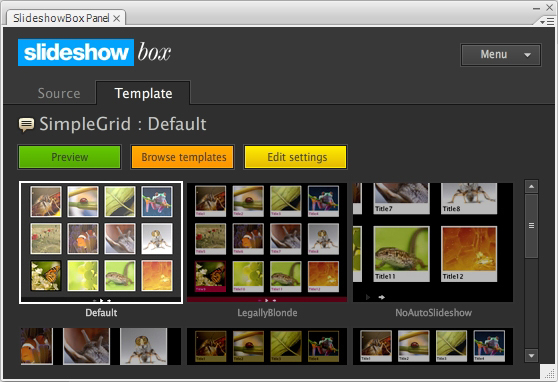
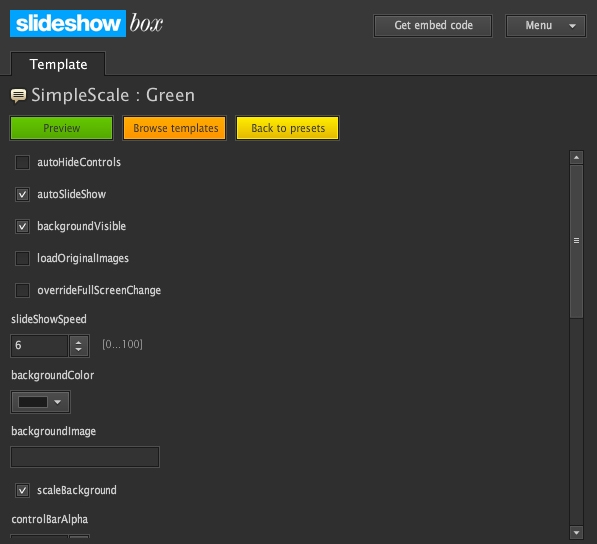
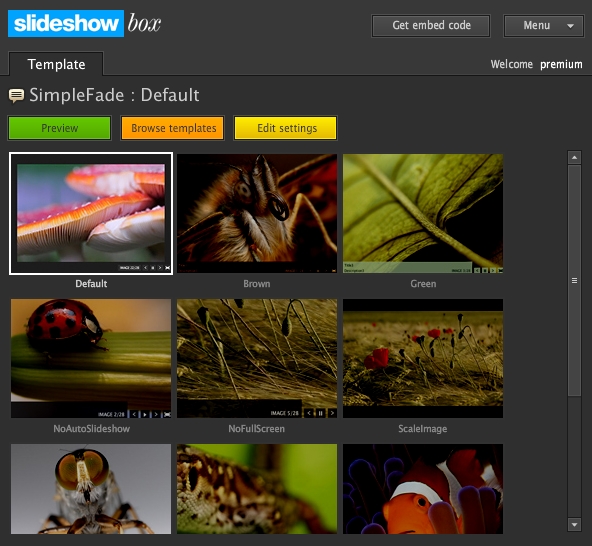
2. Once the template is selected, a list of ready-made presets will open, with the default preset already selected. You can select any of the existing presets or further customize them.
3. To further customize the default or another preset selected by you, simply click on the Edit settings button to open up the configuration panel and set the properties of the selected template to suite your needs.
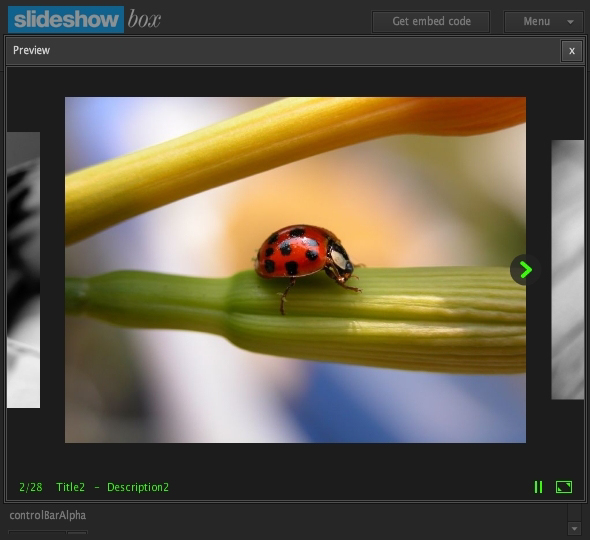
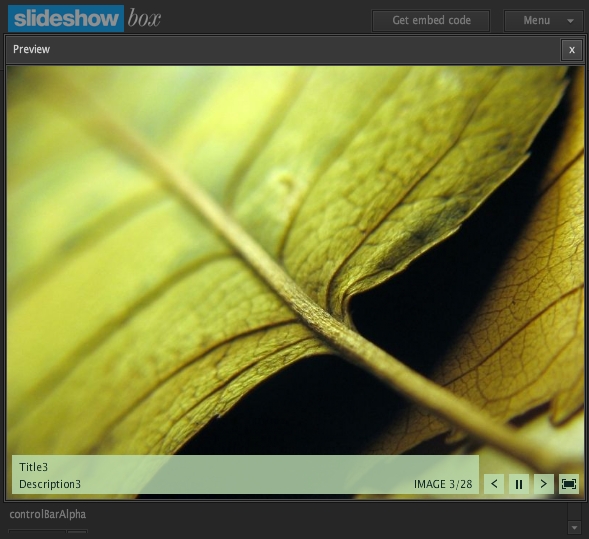
4. After selecting templates, presets and making changes to album properties you can click the Preview button to view the changes in the Preview window of the panel and see how the album will look like.
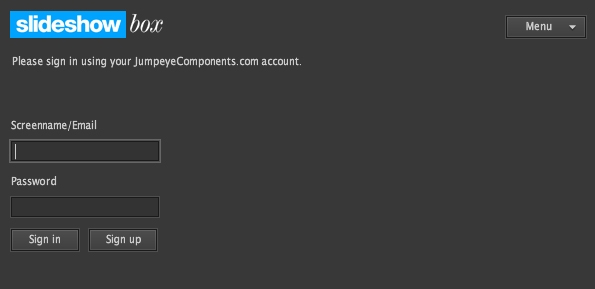
5. Once you are happy with the look of the album click the Get embed code button to get the embed code and paste it into your HTML page. If you didn't sign in with your JumpeyeComponents.com account you'll be prompted to do so before getting the embed code.
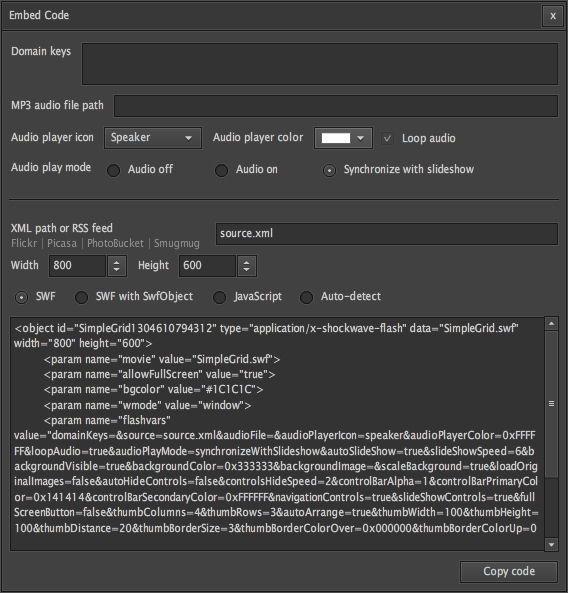
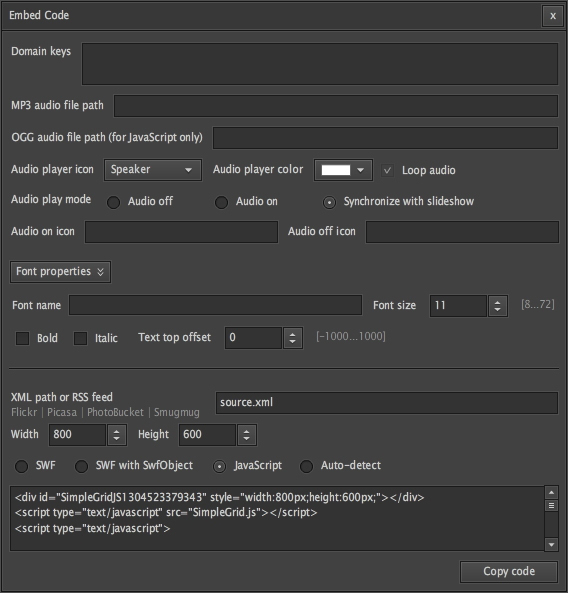
6. After signing into the panel, the Embed Code window will open allowing you to set the path/URL to the source XML file containing the list of images and set the embed size for your album. You can also select the type of embed code to use. You can also select the type of embed code to use.
Important note: A watermark will be displayed, if you do not set the domain key property with the correct key (corresponding to the domain where the slideshow will be hosted on).
For more information on the source XML file for the albums please consult The Source XML File document found inside the SlideshowBox package or at this URL: http://www.slideshowbox.com/how-to-use.html#xml-source
Note: For SlideshowBox templates that have full JavaScript alternatives developed, you can
choose from two more ways of embed:
- embed only the JavaScript version of the album
- use an auto-detect code which will embed the JavaScript album only if Flash Player is not found in the browser and the Flash version of the album (.swf file) cannot be embedded
Finally, click the Copy Code button to copy the embed code into the Clipboard and then you can paste it into your own HTML file.
Note: You can also change de values of the template parameters right in the HTML file, after you have pasted the embed code. In this case, when changing color settings, please note that the values should be specified in hexadecimal notation with the "0x" characters as a prefix to the color values. However, we recommend using the SlideshowBox online panel to make any changes to the album settings and then simply copy and paste the new embed code into your HTML file.
Structuring Your Album In Folders
There are several situations, depending on where the .html, .xml, .swf, .js files and images are located because SWF files look for their assets in the path relative to the HTML file that embeds them.
1. SWF file in the same folder with HTML, XML files and images
This is the simplest case when embedding the SWF file into the HTML page. You can simply specify the file name of the .swf file and the file name of the .xml file, since they are in the same folder.
www.mydomain.com/slideshows/album.html
www.mydomain.com/slideshows/album.swf
www.mydomain.com/slideshows/album.xml
www.mydomain.com/slideshows/images/thumbnails/ - folder for the thumbnail images
www.mydomain.com/slideshows/images/large/ - folder for the large images
www.mydomain.com/slideshows/images/fullscreen/ - folder for the full screen images
			<object id="album1" type="application/x-shockwave-flash" data="album.swf" width="800" height="600">

			    <param name="movie" value="album.swf">

			    <param name="allowFullScreen" value="true">

			    <param name="bgcolor" value="#1C1C1C">

			    <param name="flashvars" value="source=album.xml&other parameters...">

			</object>
The source XML could also contain only the path relative to the .swf file, since they are in the same parent folder:
			<SlideshowBox>

			    <items>

			        <item>

			            <thumbnailPath>images/thumbnails/image01.jpg</thumbnailPath>

			            <largeImagePath>images/large/image01.jpg</largeImagePath>

			            <fullScreenImagePath>images/fullscreen/image01.jpg</fullScreenImagePath>

			            <title><![CDATA[Image 1]]></title>

			            <description><![CDATA[Description for image 1]]></description>

			        </item>

			        ...other album items...

			    </items>

			<SlideshowBox>
For more information on the source XML file for the albums please consult The Source XML File document found inside the SlideshowBox package or at this URL: http://www.slideshowbox.com/how-to-use.html#xml-source
2. SWF and XML file in the same folder but with the HTML in a different folder
In this case you can use the base parameter of the <object> tag to specify a base path for the
SWF file so it will know that the XML file and images are found relative to that base path.
Example
Let's say you have a special folder where you keep your slideshows (mydomain.com/slideshows/). This folder would contain the .swf and .xml file together with the folders for the thumbnails, large images and full screen images. However, the .html file is located into a different folder (mydomain.com/photoalbums/). So your folder structure would look like this:
www.mydomain.com/slideshows/album.swf
www.mydomain.com/slideshows/album.xml
www.mydomain.com/slideshows/images/thumbnails/ - folder for the thumbnail images
www.mydomain.com/slideshows/images/large/ - folder for the large images
www.mydomain.com/slideshows/images/fullscreen/ - folder for the full screen images
www.mydomain.com/photoalbums/album1/album1.html
In this case in the embed code you would have to specify the base path for the .swf file but the source property of the album (specified in the FlashVars parameter) can contain only the name of the XML file because the Flash album will know to load it from the specified base path:
			<object id="album1" type="application/x-shockwave-flash" data="album.swf" width="800" height="600">

			    <param name="movie" value="album.swf">

			    <param name="allowFullScreen" value="true">

			    <param name="bgcolor" value="#1C1C1C">

			    <param name="base" value="http://www.mydomain.com/slideshows/">

			        or

			    <param name="base" value="../../slideshows/">

			    <param name="flashvars" value="source=album.xml&other parameters...">

			</object>
3. All the album assets are found in different folders
In this case not only that the .html and .swf files are in different folders, but also the .xml file and images are placed in different folders than the one containing the .swf file:
www.mydomain.com/swffiles/album.swf
www.mydomain.com/xmlfiles/album.xml
www.mydomain.com/images/slideshow/thumbnails/ - folder for the thumbnail images
www.mydomain.com/images/slideshow/large/ - folder for the large images
www.mydomain.com/images/slideshow/fullscreen/ - folder for the full screen images
www.mydomain.com/photoalbums/album1/album1.html
In this case we recommend using absolute paths for all your files: path to .swf and .xml files and also the path specified in the .xml file for each of the images, so you do not need the base path specified.
			<object id="album1" type="application/x-shockwave-flash" data="http://www.mydomain.com/swffiles/album.swf" width="800" height="600">

			    <param name="movie" value="http://www.mydomain.com/swffiles/album.swf">

			    <param name="allowFullScreen" value="true">

			    <param name="bgcolor" value="#1C1C1C">

			    <param name="flashvars" value="source=http://www.mydomain.com/xmlfiles/album.xml&other parameters...">

			</object>
And the XML file would contain the absolute paths of the images:
			<SlideshowBox>

			    <items>

			        <item>

			            <thumbnailPath>http://www.mydomain.com/images/slideshow/thumbnails/image01.jpg</thumbnailPath>

			            <largeImagePath>http://www.mydomain.com/images/slideshow/large/image01.jpg</largeImagePath>

			            <fullScreenImagePath>http://www.mydomain.com/images/slideshow/fullscreen/image01.jpg</fullScreenImagePath>

			            <title><![CDATA[Image 1]]></title>

			            <description><![CDATA[Description for image 1]]></description>

			        </item>

			        ...other album items...

			    </items>

			<SlideshowBox>
For more information on the source XML file for the albums please consult The Source XML File document found inside the SlideshowBox package or at this URL: http://www.slideshowbox.com/how-to-use.html#xml-source.
Note: You can also set up the albums by modifying the values from the FlashVars parameter, directly in your HTML file where the SWF file is embedded. In this case, when changing color settings, please note that the values should be specified in hexadecimal notation with the "0x" characters as a prefix to the color values. For JavaScript albums, the colors are specified as hexadecimal values but with the "#" character as a prefex. However, we recommend using the SlideshowBox online panel to make any changes to the album settings and then simply copy and paste the new embed code into your HTML file.
JavaScript embed
Important limitation: The JavaScript versions of the SlideshowBox templates will not work in Google Chrome when tested locally, on your computer, due to Google Chrome's security sandbox. To test the JavaScript albums with Google Chrome we recommend using a webserver, even locally, on your computer.
Notes:
- When using the JavaScript version of the SlideshowBox templates with Firefox, you can
only use .ogg audio files to play during the slideshow because Firefox does not
support .mp3 files.
- The slideshow will display a watermark if you do not supply a correct domain key the
domain key must correspond to the domain the slideshow will be hosted on.
The easiest way to set up an album and embed it into your own HTML page is by using the SlideshowBox online configuration panel: http://www.slideshowbox.com/online-panel.html.
1. Open the SlideshowBox online configuration page and select the template you would like to use to display your album. Please note that not all the templates have implementations in JavaScript. Those templates that do, will have the (*js) text beside their names.
2. Once the template is selected, a list of ready-made presets will open, with the default preset already selected. You can select any of the existing presets or further customize them.
3. To further customize the default or another preset selected by you, simply click on the Edit settings button to open up the configuration panel and set the properties of the selected template to suite your needs.
4. After selecting templates, presets and making changes to album properties you can click the Preview button to view the changes in the Preview window of the panel and see how the album will look like.
5. Once you are happy with the look of the album click the Get embed code button to get the embed code and paste it into your HTML page. If you didn't sign in with your JumpeyeComponents.com account you'll be prompted to do so before getting the embed code.
6. After singing into the panel, the Embed Code window will open allowing you to set the path/URL to the source XML file containing the list of images and set the embed size for your album. You can also select the type of embed code to use. For JavaScript only albums you should select the JavaScript option.
Important note: A watermark will be displayed, if you do not set the domain key property with the correct key (corresponding to the domain where the slideshow will be hosted on). If you would like to use SlideshowBox on subdomains of the main domain you specified, please contact us at:
For more information on the source XML file for the albums please consult The Source XML File document found inside the SlideshowBox package or at this URL: http://www.slideshowbox.com//how-to-use.html#xml-source.
Note: Not all the SlideshowBox templates are available in JavaScript. For those templates that
have full JavaScript alternatives developed, you can choose from two more ways of embed code
than the Flash only templates:
- embed only the JavaScript version of the album
- use an auto-detect code which will embed the JavaScript album only if Flash Player is not
found in the browser and the Flash version of the album (.swf file) cannot be embedded
Finally, click the Copy Code button to copy the embed code into the Clipboard and then you can paste it into your own HTML file.
Note: You can also change de values of the template parameters right in the HTML file, after you have pasted the embed code. In this case, when changing color settings, please note that the values should be specified in hexadecimal notation with the "#" character as a prefix to the color values. However, we recommend using the SlideshowBox online panel to make any changes to the album settings and then simply copy and paste the new embed code into your HTML file.
JavaScript Template Main Properties
The SlideshowBox templates have a set of paramers that are used to set up the albums (the way they look and work). Each SlideshowBox template has a PDF document describing each property, found in the documentation folder of the package. The JavaScript versions of the SlideshowBox have a set of extra parameters used when embedding the templates in the HTML pages:
| Property name | Description |
|---|---|
| appendToID | The id of the HTML element into which the album will be embedded. In this case we recommend adding the albums into DIV elements. The albums will be displayed after the element's content. |
| audioFile |
The URL or path and file name to the mp3 file used as background
sound. If there is an audio file specified, then the component will
start to play it according to the audioPlayerMode setting. In this case
the audio player will be displayed in the top-right corner of the album
and you can interact with it. If there is no audio file specified or there was an error reading the audio file, the player will not be displayed. |
| audioFileAlt | The URL to an alternative .ogg audio file. This audio file is loaded by the album when viewed in Firefox, because Firefox does not support .mp3 files. Within other browsers, the .mp3 file specified at the audioFile property is used. |
| audioPlayerColor | Specifies the color used by the audio player icon. The default color is white (#FFFFFF). |
| audioPlayerIcon |
The icon used to represent the audio player. Possible values are
"speaker" and "equalizer". The default value is "speaker".
Depending on the selected icon, the audio player will be displayed either as a speaker or equalizer bars. Each type of icon has two states: audio on and audio off. The audio player states will change only when the user interacts with the audio player (by clicking on the icons). |
| audioPlayerOff | The name of an image file to be used as the "audio off" symbol for the audio player. If you only specify one of the ON or OFF states, the audio player will display the default icon (speaker or equalizer) for the other missing state. |
| audioPlayerOn | The name of an image file to be used as the "audio on" symbol for the audio player. If you only specify one of the ON or OFF states, the audio player will display the default icon (speaker or equalizer) for the other missing state. |
| audioPlayMode |
The way the audio will play during the slideshow: play the audio
automatically, the audio is stopped by default and synchronize with the
slideshow. Possible values are - audioOn starts the audio automatically - audioOff loads the album but the audio file will not play and the audio player will display the OFF icon - synchronizeWithSlideshow the audio file is played only when the slideshow is playing. In this case the audio player buttons work like mute/unmute buttons, so when the audio player is in the OFF state (mute) the audio file will not play, even if the slideshow is playing. The default value is synchronizeWithSlideshow. |
| domainKeys |
A list of hash keys generated for the Internet domains where the
slideshow will be hosted on. The list can contain at least one key
corresponding for an Internet domain.
Note: If such a domain key is not specified, the slideshow will always display a watermark. When the slideshow is tested within the Adobe Flash Professional IDE or viewed on a local computer the watermark will always be displayed because the slideshow is not hosted on an Internet domain. Form more information on the domain keys please consult the User Manual. |
| source |
The URL of the source XML file containing the list of images for the
SlideshowBox template.
It can also receive the URL of the RSS object for Flickr, Picasa, PhotoBucket or Smugmug albums. Note: For information on how to use the RSS for Flickr, Picasa, Photobucket or Smugmug albums, please consult the "Using SlideshowBox with RSS feeds" PDF file. |
Example
				$.slideshowBoxEmbedCanvas.init({

					    appendToID:"TemplateNameRandomID",

					    domainKeys:"27hd8m731bca8",

					    audioFile:"music.mp3",

					    audioFileAlt:"music.ogg",

					    imagesXmlPath:"source.xml",

					    width:800, height:600,

					    controlBarAlpha:"1",

					    controlBarPrimaryColor:"#333333",

					    controlBarSecondaryColor:"#CCCCCC",

					    slideShowControls:"true",

					    fullScreenButton:"true",

					    navigationControls:"true",

					    ...other parameters...

				});
Structuring Your Album In Folders
Each JavaScript SlideshowBox template uses a JavaScript file (.js) having the same name as the template name, placed in the same folder with the sample HTML file and the source XML file. The FrameSlide JavaScript template also uses a .png file for a background image. At leas this is the structuring methode used for the HTML package provided with the SlideshowBox package.
However, it is possible that you place the files in different folders, if you would like the albums to follow your own rules of structuring the website (for example, all images into a single folder and all the .js files into another folder).
Example
				$.slideshowBoxEmbedCanvas.init({appendToID:"TemplateNameRandomID",

					    imagesXmlPath:"http://www.mydomain.com/assets/source.xml",

					    width:800, height:600,

					    audioFile:"media/music.mp3", audioFileAlt:"media/music.ogg",

					    ...other parameters...

				});
If the images displayed in the album are also placed into a different folder than the HTML file and JavaScript album, then we recommend specifying the path to the images in the XML file using absolute paths. For more information on the source XML file for the albums please consult The Source XML File document found inside the SlideshowBox package or at this URL: http://www.slideshowbox.com/how-to-use.html#xml-source.
Learn how to build a source XML
The source XML contains a list of item elements (an element is identified by a XML tag specified between the "<" and ">" characters), each item element (tag) having extra child elements that represent the URL for the images, text for the title and description and other extra (custom) parameters the user might require. So a typical source XML file might look like this:
			<SlideshowBox>

			    <items>

			        <item>

			            <thumbnailPath>URL for the thumbnail image 1</thumbnailPath>

			            <largeImagePath>URL for large image 1 (mandatory)</largeImagePath>

			            <fullScreenImagePath>URL for full screen image 1</fullScreenImagePath>

			            <title><![CDATA[The title for image 1 goes here]]></title>

			            <description><![CDATA[Description for image 1 goes here]]></description>

			        </item>

			        <item>

			            <thumbnailPath>URL for the thumbnail image 2</thumbnailPath>

			            <largeImagePath>URL for large image 2 (mandatory)</largeImagePath>

			            <fullScreenImagePath>URL for full screen image 2</fullScreenImagePath>

			            <title><![CDATA[The title for image 2 goes here]]></title>

			            <description><![CDATA[Description for image 2 goes here]]></description>

			        </item>

			        <item>

			            <thumbnailPath>URL for the thumbnail image 3</thumbnailPath>

			            <largeImagePath>URL for large image 3 (mandatory)</largeImagePath>

			            <fullScreenImagePath>URL for full screen image 3</fullScreenImagePath>

			            <title><![CDATA[The title for image 3 goes here]]></title>

			            <description><![CDATA[Description for image 3 goes here]]></description>

			        </item>

			            ...

			        <item>

			            <thumbnailPath>URL for the thumbnail image N</thumbnailPath>

			            <largeImagePath>URL for large image N (mandatory)</largeImagePath>

			            <fullScreenImagePath>URL for full screen image N</fullScreenImagePath>

			            <title><![CDATA[The title for image N goes here]]></title>

			            <description><![CDATA[Description for image N goes here]]></description>

			        </item>

			    </items>

			</SlideshowBox>
The <item> element contains all the information regarding each image from the album.
Note: The text written in italics in the above example should be replaced by your actual image URLs, titles and descriptions.
Note: Click here to view a sample source XML file.
<thumbnailPath>
This element contains the URL of the thumbnail images. If the album template uses thumbnails,
this is where it will look for the path and file name of the thumbnails. If this value is missing, the
album template will use the large images as thumbnails.
<largeImagePath>
This element is the most important one and it is mandatory. It contains the URL for the large
images used in the normal screen mode. This value should not be missing, otherwise
the albums will not work properly or at all. The large images could also replace the thumbnails
and the large images used in full screen mode.
<fullScreenImagePath>
This element contains the URL to the large images displayed in full screen mode. When entering
in full screen, the album will load the large images specifies by this element. If the value is
missing, the albums will use the normal screen large images instead, specified by the <largeImagePath> element.
Note: The URL of the images and thumbnails can be specified either as absolute path the full path containing the protocol (http://), domain name (www.mysite.com) and directory path (/slideshows/images/) - or the relative path to the images relative to another location on the hosting server. If you are unsure of how to specify the path/URL to the images, we recommend using the absolute path, that is specifying the complete path/URL to the image to avoid confusion.
Example
- absolute path: http://www.mydomain.com/slideshows/images/thumbnails/thumb01.jpg
- relative path: images/thumbnails/thumb01.jpg the path is relative to the slideshows
folder on the root of the domain (http://www.mydomain.com/slideshows/).
<title> and <description>
These two elements contain the title and description for the images. The text in these two
elements should be added as CDATA text.
Example
<![CDATA[This is a description of the image.]]>
Custom XML elements
Note: The custom XML elements of each item can only be accessed from within Adobe Flash applications (you need to use ActionScript 3.0 code to access them).
Besides the standard elements, you can also specify other elements representing extra
properties for the image items in the album: extra descriptions for the images, prices associated
to the images (if the album would represent a list of products) or simply some other information
you could use to execute different actions in your Flash application that contains the album.
These extra elements will be then added as properties directly to the image item objects so you
can then retrieve their values via ActionScript code: myAlbum.imageList[2].title or
myAlbum.imageList[4].myProperty.
Example
	        <item>

	            <largeImagePath>images/image4.jpg</largeImagePath>

	            <link>http://www.somedomain.com/</link>

	            <target>_blank</target>

	            <companyName>Some Company, Inc.</companyName>

	            <type>video</type>

	            <videoURL>http://www.somedomain.com/videos/video1.flv</videoURL>

	        </item>
This way, by verifying the value of the element <type> (actually by checking
the type property added to the item), you could load a video clip into a video player when
that particular image is displayed.
Example
			import com.jumpeye.events.SlideshowBoxEvent;


			myAlbum.addEventListener(SlideshowBoxEvent.PHOTO_SHOW, checkForVideo);


			function checkForVideo(e:SlideshowBoxEvent):void {

			    var imageIndex:int = e.item.index;

			    if (myAlbum.imageList[imageIndex].type == "video") {

			        var videoURL:String = myAlbum.imageList[imageIndex].videoURL;

			        loadVideo(videoURL);

			    }

			    else {

			        showAlternativeContent();

			    }

			}
Using RSS feeds
Note: The SlideshowBox component is not compatible with Atom feeds. It only works with RSS 2.0 feeds.
1. Flickr
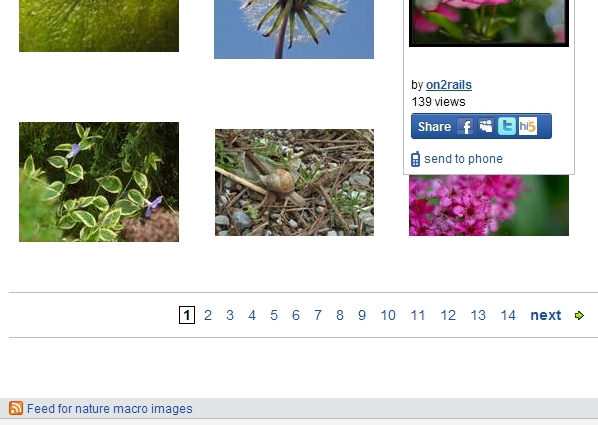
You can either retrieve the RSS feed from a user's entire photo stream or you can take the RSS
feed of a single album
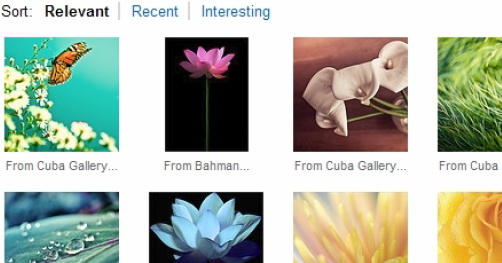
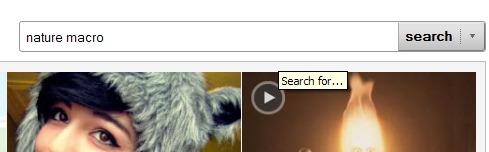
search on flickr.com the types of images you are interested to see in a slideshow

select one of the images from the results list to enter into a user's album
- once the photo page is loaded, select the user id to open his Flickr page
- on the user's Flickr page you can see his/hers photo stream
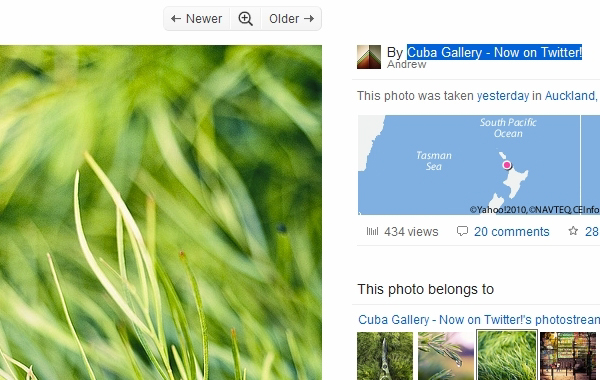
- on the bottom side of the page there is the RSS link for that photo stream

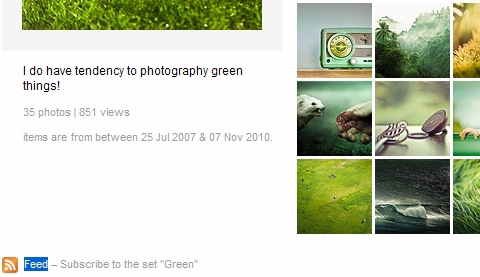
another way would be to display the sets' list for the selected user
from the sets' list select one set and on the bottom side of the album's page you'll have a
link to the album's RSS feed: click on it so you can open the RSS feed and copy its URL
from the browser's address bar
Note: Flickr changed its Feed type from Rss 2.0 to Atom, so to make sure that the feed type is RSS 2.0 you should check to see wether the parameter format=rss_200 exists in the feed's URL and if not, add it like so: http://api.flickr.com/services/feeds/photoset.gne?set=72157625552986828&nsid=36587311@N08&lang=en-us&format=rss_200
Note: Flickr limits the number of images added to this kind of feed, so it is possible that the SlideshowBox slideshow will display less images than there are in the actual Flickr album.
2. Picasa
search on picasaweb.google.com the types of images you are interested to see in a slideshow

under each image from the results list there is a link of the user who uploaded that image
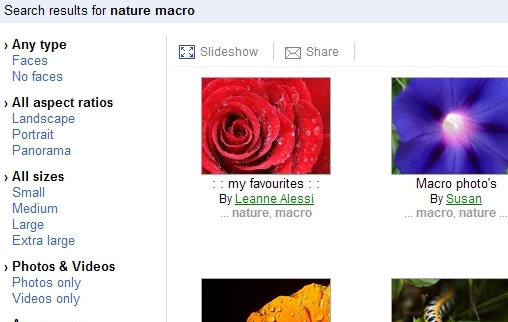
click on the user's name to display the list of albums for that user
click on one of the albums of the selected user to bring up the list of images (thumbnail view) for that album
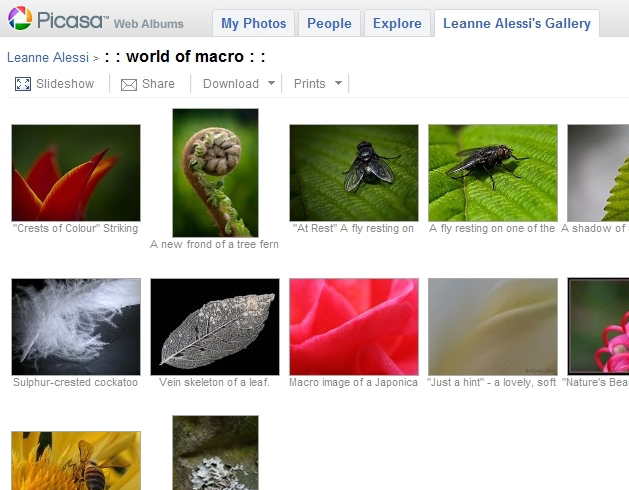
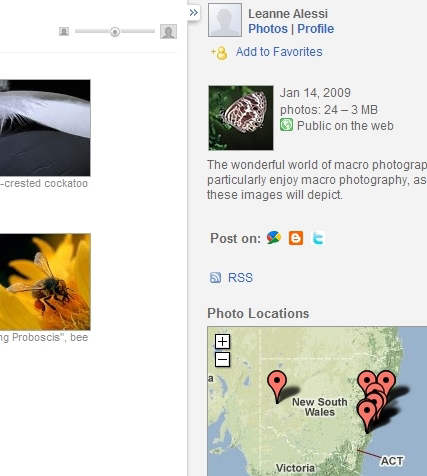
on the right side of the page you can find a link to the RSS feed of the album: click on it so you can open the RSS feed and copy its URL from the browser's address bar
3. PhotoBucket
search on photobucket.com the types of images you are interested to see in a slideshow
with PhotoBucket, you can even retrieve the RSS feed for the images included in your search result at the bottom of the page you'll find the RSS feed for the search result: click on it so you can open the RSS feed and copy its URL from the browser's address bar
under each image from the results list there is a link of the user who uploaded that image

click on the user's name to display the list of albums for that user
at the bottom of the page, there is a link to the RSS feed containing all of the user's content: click on it so you can open the RSS feed and copy its URL from the address bar

on the top of the user's page you can select the All Albums tab to display the user's albums

by selecting one of the albums, you can see all the images included in that specific album
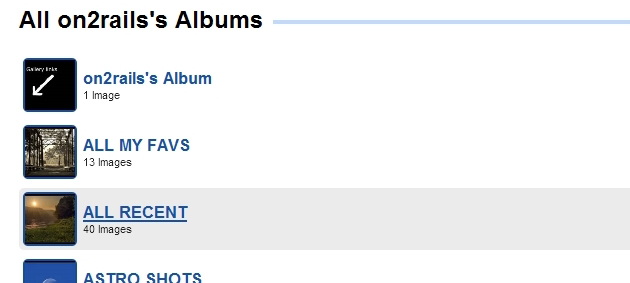
at the bottom of the page there is a link to the RSS feed of the album, next to the link of the RSS feed of the user's entire content: you can click either of them to open the RSS feed and copy its URL from the browser's address bar

4. Smugmug
search on smugmug.com the types of images you are interested to see in a slideshow
with Smugmug, you can even retrieve the RSS feed for the images included in your search result
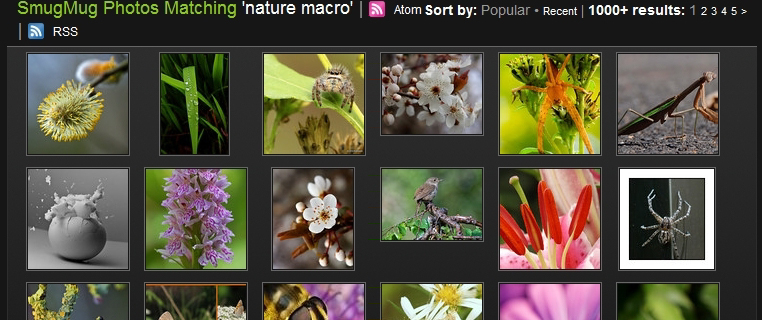
click on the Available Feeds link at the bottom of the page to open the list of feeds and select RSS to open the feed and copy its URL from the browser's address bar

by clicking on an image from the search result, you'll be taken to a user's photo stream that contains the selected image at the bottom of the page you'll find the same Available Feeds link where you can select and open the RSS feed

on the top side of the page you'll find the owner's username and by clicking on it, you'll get the list of albums for that user; by clicking on another album you'll be able to get the RSS feed the same way as with the previously opened album
Note: Smugmug limits the number of images added to this kind of feed, so it is possible that the SlideshowBox slideshow will display less images than there are in the actual Smugmug album.